May
2026
I had two reasons to make this project. First, I am an avid collector of rock crystals and I wanted a way to display and illuminate them. Second I wanted to try my hand at vibe coding to see if I could make code development faster than the line by line coding I am used to doing. I think I succeeded in both cases. With what I have developed here I can have multiple crystal displays placed around my home which I can control remotely with a web based user interface.
The Hardware
The hardware for this project could not be simpler. It consists of a small ESP32 module hardwired to a single NeoPixel LED. The LED can be any variety of NeoPixel as long as it can be controlled with the Adafruit NeoPixel library. Wiring consists of 3 wires. GPIO pin 5 of the ESP32 is connected to DIn of the NeoPixel. The Vcc or +5V pin of the ESP32 is connected to +5V of the NeoPixel and Gnd from the ESP32 is connected to gnd of the NeoPixel. That is it.
The Software
The software was developed for the Arduino environment. I started out by writing a textual description of what I wanted the NeoPixel controller to do and I submitted it to Claude to see what would happen. The text based prompt I created is shown at the bottom of this page. I was amazed that the code Claude produced worked the first time. I had to make a few changes to the generated code to fine tune it and since the NeoPixel is going to be controlled remotely, I added MDNS support. MDNS support was needed so I wouldn't have to deal with actual IP address when controlling different displays. Currently I am running 3 separate crystals displays in my house and I address them as:
CrystalLight1.local, CrystalLight2.local and CrystalLight3.local.
The software for each controller has to be configured. Specifically, the user name and password for the local WiFi network and the hostname to be assigned must be specified. It looks like this in the code:
const char* WIFI_SSID = "YourNetworkName";
const char* WIFI_PASSWORD = "YourNetworkPassword";
const char* HOST_NAME = "CrystalLight1"; // or whatever hostname you want to assign.
Once these parameters are set, the code can be compiled and uploaded to the ESP32 controller in the display. Once uploaded, connect to the NeoPixel controller via your browser. You should see the UI shown below which is used to control the NeoPixel LED.
Packaging
I knew I had to protect the ESP32 controller so I designed a 3D printed case for it. The case needed to have an opening for the USB cable that plugs into and powers the ESP32 module and an opening for the single NeoPixel LED to shine through. I made the case round but there isn't any reason it couldn't have been made rectangular. I could have stopped there and placed my crystals directly upon the 3D printed case but I wanted a somewhat more decorative display platform. For this I designed two laser cut assemblies/platforms that the 3D printed case of the NeoPixel controller would slide into. These platforms are shown below.
Possibilities and Enhancements
I use the NeoPixel controllers for displaying and illuminating crystal specimens in my rather extensive collection. You might have other uses like shelf lighting, picture frame lighting or model train lighting. In my case the NeoPixel is closely coupled to the ESP32 but that isn't strictly necessary. You could run wires from the ESP32 a short distance to where the NeoPixel is to be placed. It would also be possible to control more than a single NeoPixel but that would require code changes to be made. These changes could be made manually or you might ask Claude to do them for you.
I had two reasons to make this project. First, I am an avid collector of rock crystals and I wanted a way to display and illuminate them. Second I wanted to try my hand at vibe coding to see if I could make code development faster than the line by line coding I am used to doing. I think I succeeded in both cases. With what I have developed here I can have multiple crystal displays placed around my home which I can control remotely with a web based user interface.
The Hardware
The hardware for this project could not be simpler. It consists of a small ESP32 module hardwired to a single NeoPixel LED. The LED can be any variety of NeoPixel as long as it can be controlled with the Adafruit NeoPixel library. Wiring consists of 3 wires. GPIO pin 5 of the ESP32 is connected to DIn of the NeoPixel. The Vcc or +5V pin of the ESP32 is connected to +5V of the NeoPixel and Gnd from the ESP32 is connected to gnd of the NeoPixel. That is it.
The Software
The software was developed for the Arduino environment. I started out by writing a textual description of what I wanted the NeoPixel controller to do and I submitted it to Claude to see what would happen. The text based prompt I created is shown at the bottom of this page. I was amazed that the code Claude produced worked the first time. I had to make a few changes to the generated code to fine tune it and since the NeoPixel is going to be controlled remotely, I added MDNS support. MDNS support was needed so I wouldn't have to deal with actual IP address when controlling different displays. Currently I am running 3 separate crystals displays in my house and I address them as:
CrystalLight1.local, CrystalLight2.local and CrystalLight3.local.
The software for each controller has to be configured. Specifically, the user name and password for the local WiFi network and the hostname to be assigned must be specified. It looks like this in the code:
const char* WIFI_SSID = "YourNetworkName";
const char* WIFI_PASSWORD = "YourNetworkPassword";
const char* HOST_NAME = "CrystalLight1"; // or whatever hostname you want to assign.
Once these parameters are set, the code can be compiled and uploaded to the ESP32 controller in the display. Once uploaded, connect to the NeoPixel controller via your browser. You should see the UI shown below which is used to control the NeoPixel LED.
Packaging
I knew I had to protect the ESP32 controller so I designed a 3D printed case for it. The case needed to have an opening for the USB cable that plugs into and powers the ESP32 module and an opening for the single NeoPixel LED to shine through. I made the case round but there isn't any reason it couldn't have been made rectangular. I could have stopped there and placed my crystals directly upon the 3D printed case but I wanted a somewhat more decorative display platform. For this I designed two laser cut assemblies/platforms that the 3D printed case of the NeoPixel controller would slide into. These platforms are shown below.
Possibilities and Enhancements
I use the NeoPixel controllers for displaying and illuminating crystal specimens in my rather extensive collection. You might have other uses like shelf lighting, picture frame lighting or model train lighting. In my case the NeoPixel is closely coupled to the ESP32 but that isn't strictly necessary. You could run wires from the ESP32 a short distance to where the NeoPixel is to be placed. It would also be possible to control more than a single NeoPixel but that would require code changes to be made. These changes could be made manually or you might ask Claude to do them for you.
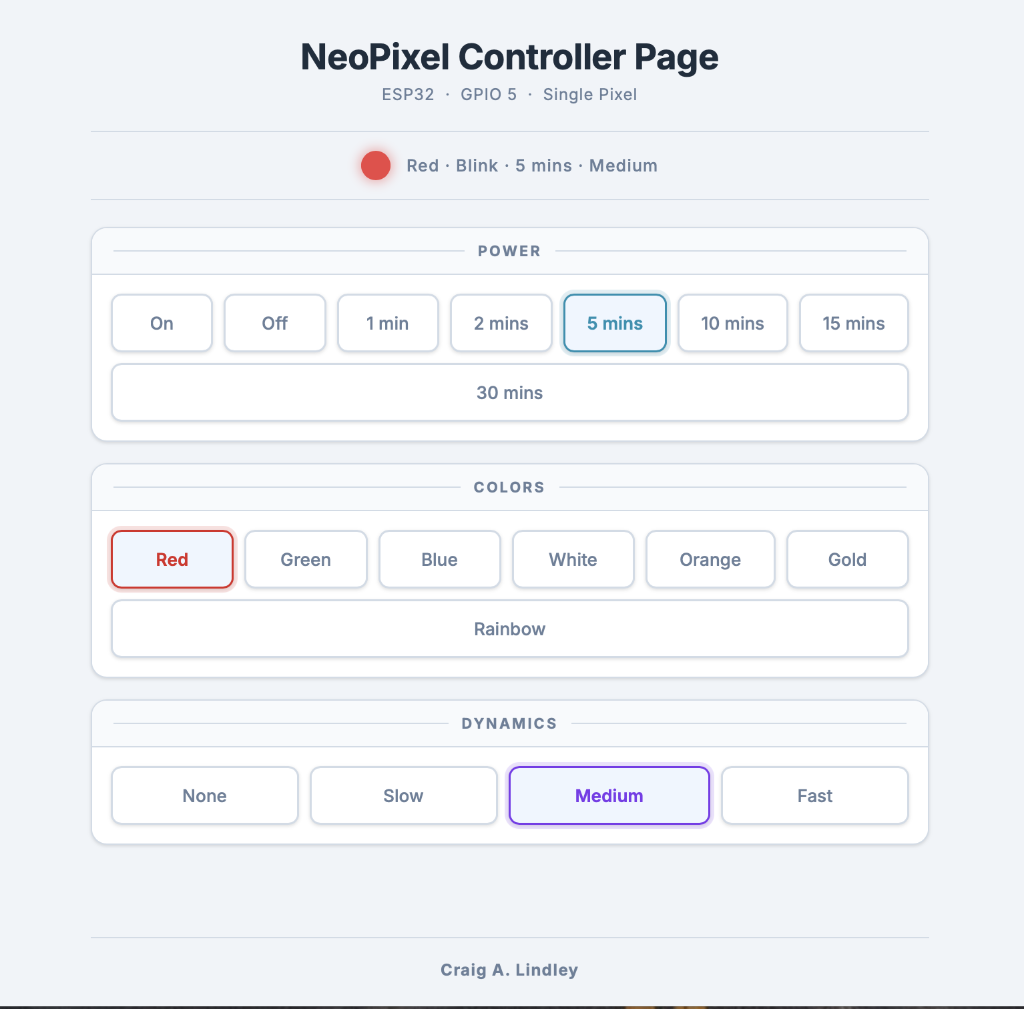 |
Here is the web based user interface of the NeoPixel
Controller. It is comprised of three sections: Power,
Colors and Dynamics. In the Power section you control the power to the NeoPixel. You can turn it on continuously, turn it off completely or you can schedule an automatic operation. If you select one of the minute operations the NeoPixel will be on for that amount of time and off for that amount of time. For example, if you select 2 mins the NeoPixel will be on for 2 minutes and then off for 2 minutes and the cycle will continue until you change it. In the Color section you select what color you want the NeoPixel to produce. There are 6 static colors and a Rainbow selection. If Rainbow is selected the NeoPixel changes colors automatically. Dynamics controls the speed at which the NeoPixel's brightness changes with time. If None is selected the NeoPixel brightness is full on and doesn't change at all. The other selections cause the brightness of the NeoPixel to vary from off to full brightness in a slow, medium or fast time frame. If Rainbow is selected, these controls control the speed at which the colors of the rainbow are traversed. |
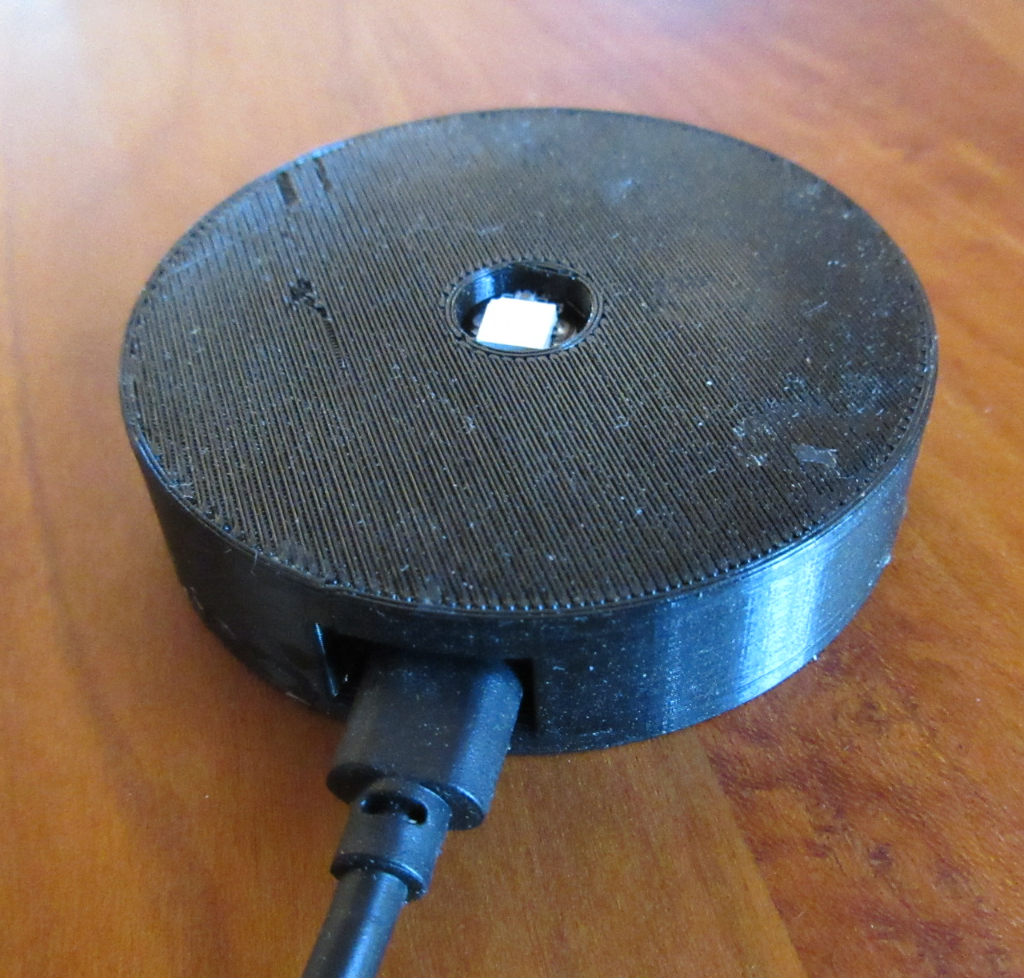 |
Here is the completely assembled unit. In this case
the NeoPixel is built in but it could be placed outside
of the case and wired to the ESP32 module. The 3D
printed case is just for protecting the ESP32. The ESP32 with the attached NeoPixel is hot glued into the 3D printed case and the case bottom is super glued to the bottom of the case. |
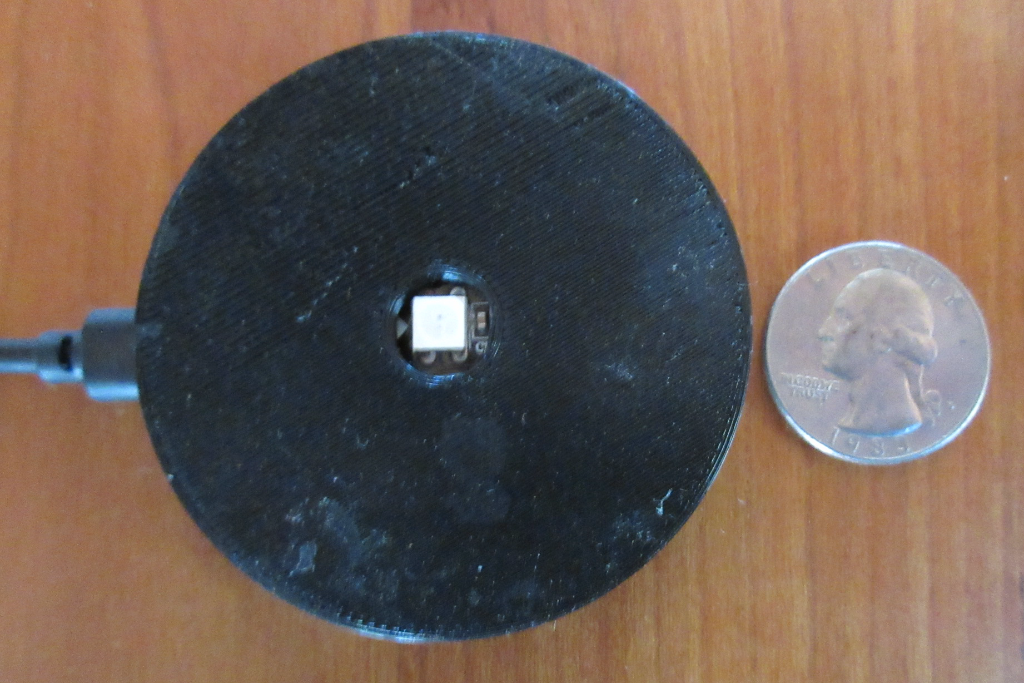 |
This gives you an indication of the size of the
controller's case. I made the case round but it could have been made rectangular as well. |
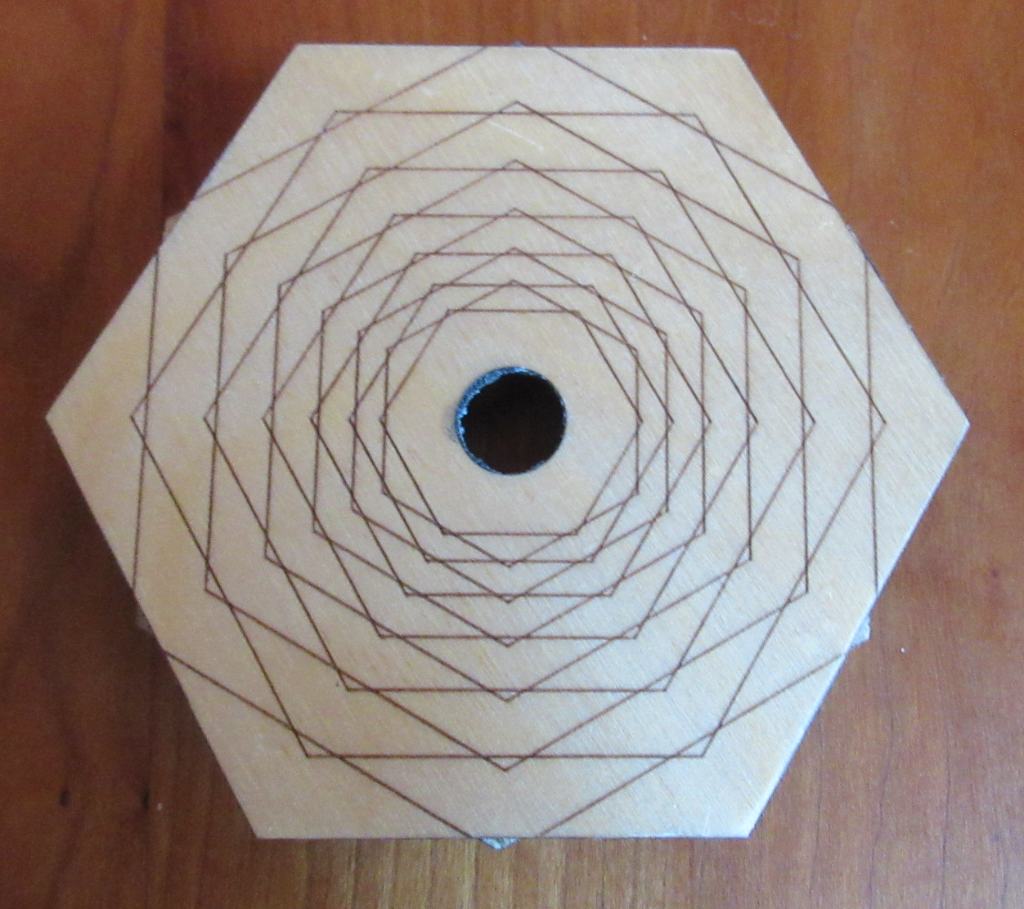 |
I built a couple of different platforms for the
controller to slide into.These are laser cut from 5
layers of 1/8" Baltic birch plywood. I use these
platforms when displaying crystals illuminated by the
NeoPixel controller. |
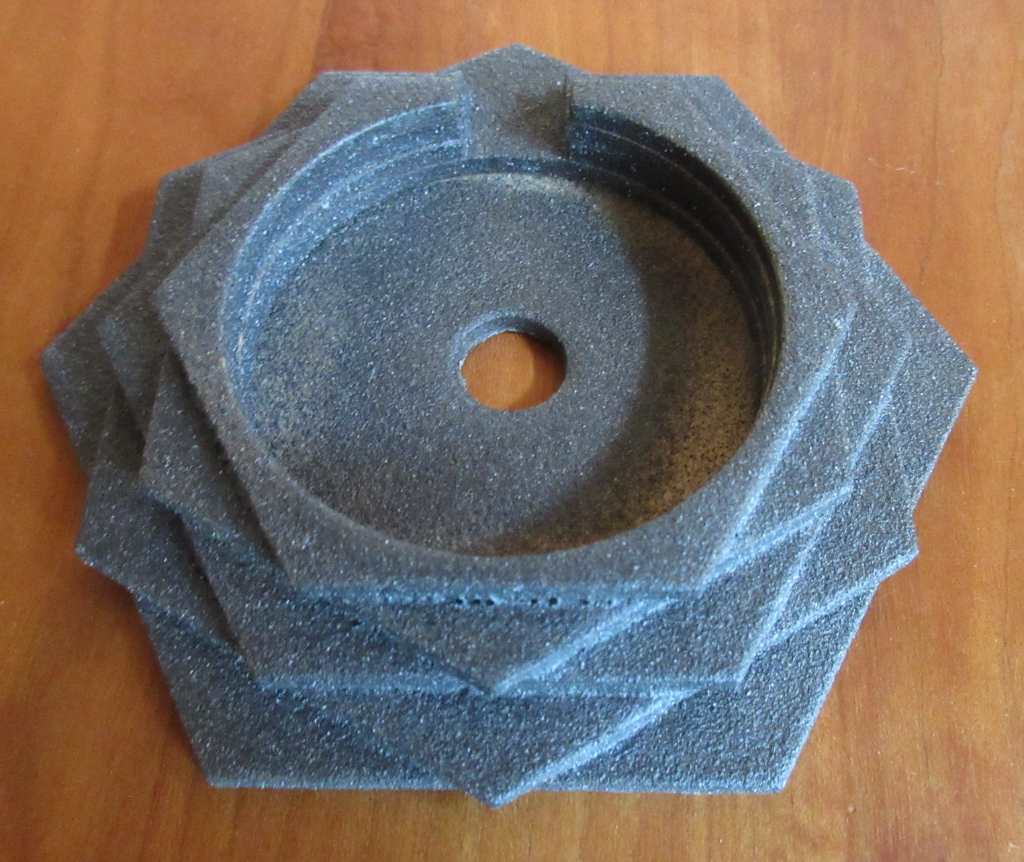 |
This is the flip side of the platform shown above. I
painted this side a textured black. The controller can
be placed into this platform either way so that I can
have a light colored platform or a dark one. |
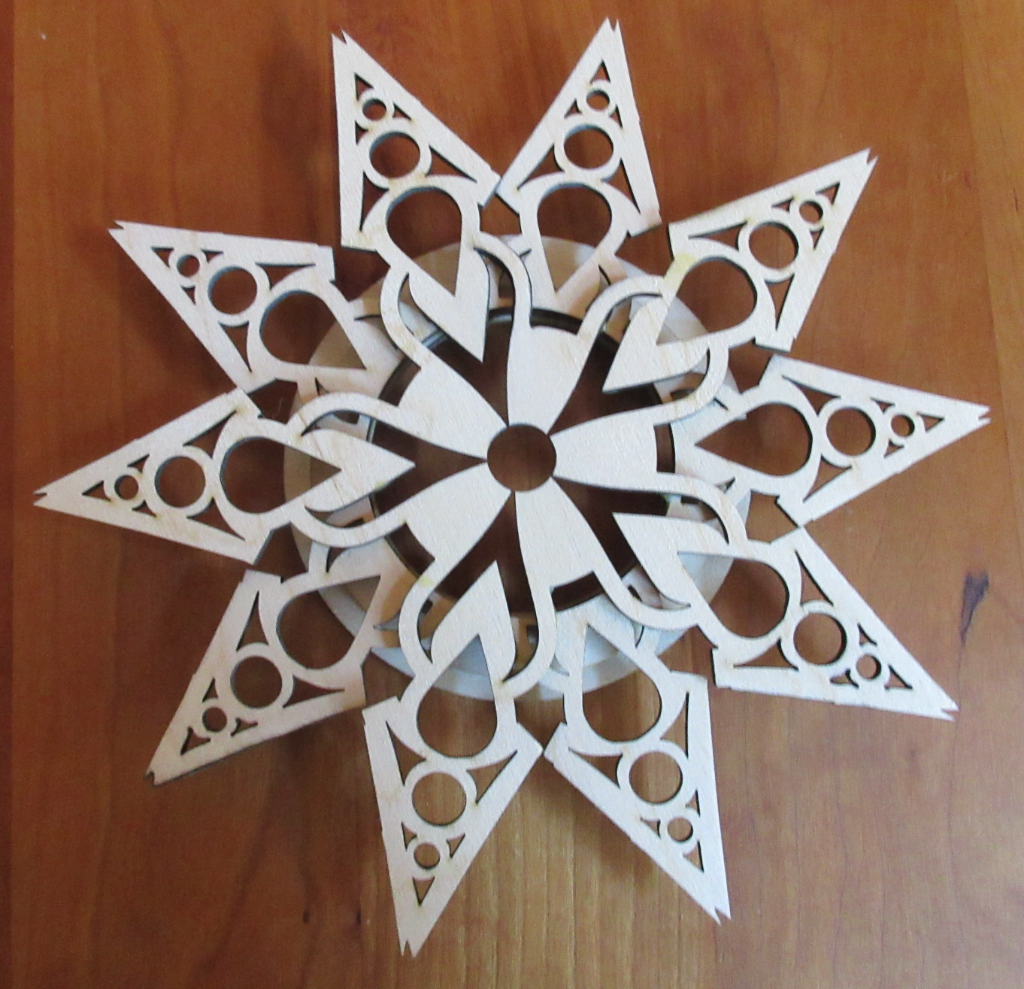 |
A rather more complicated platform for the
controller. This is also cut from 5 layers of Baltic
birch. This is also reversible to have the decorative
pattern up or down. |
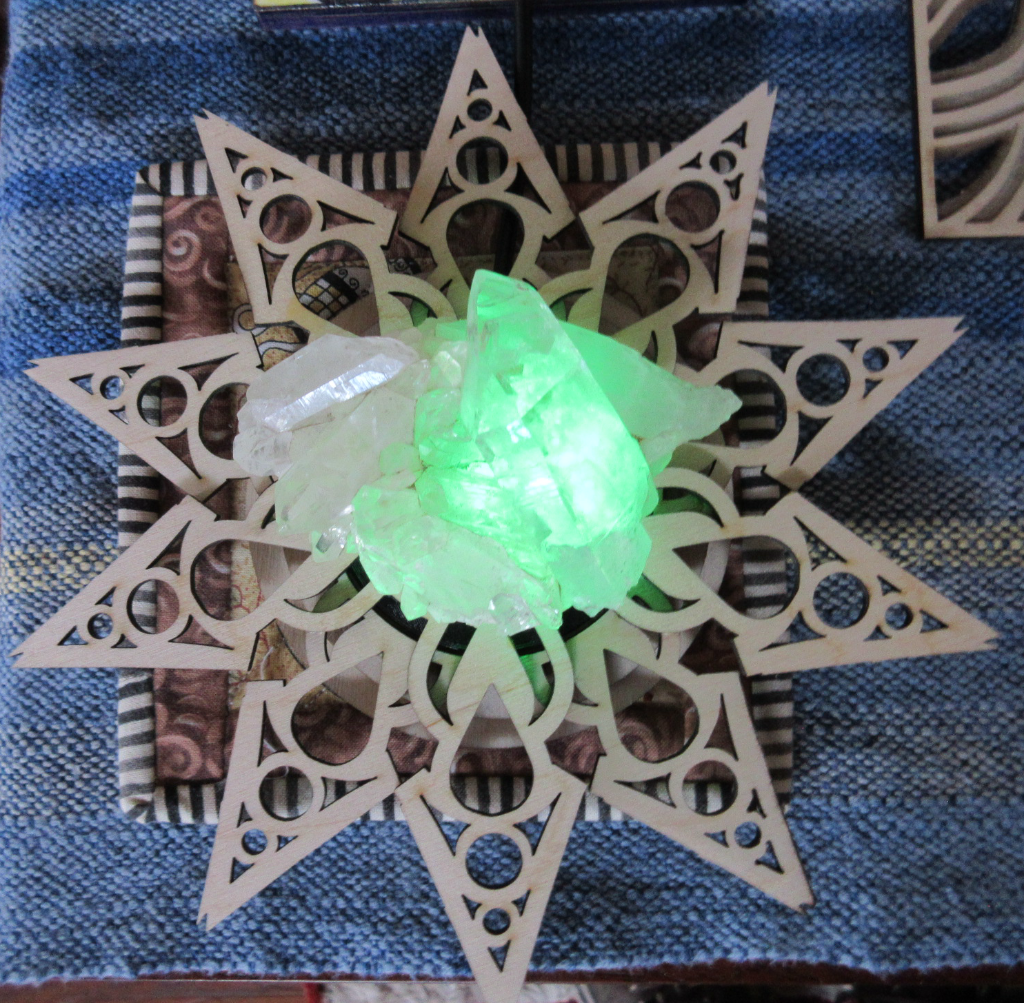 |
Here is the controller in action illuminating a
quartz crystal which is the primary reason I did this
project. I have lots of crystals that I like to light
up. This foto was taken in the daytime but at night the
crystal really glows. |
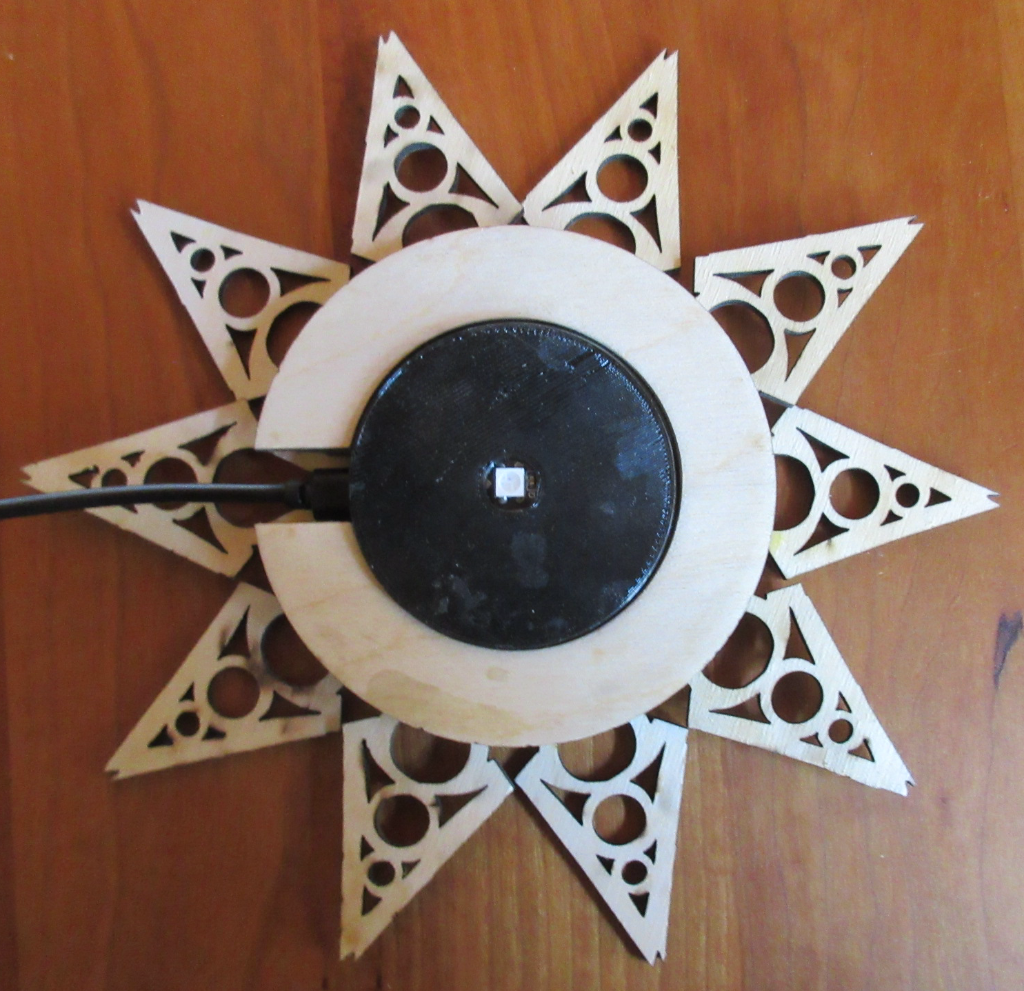 |
Here is the platform turned over. In this instance
the crystal sits right on top of the controller. |
| Generate code for use in
the Arduino environment for a ESP32 web server
application to control a single NeoPixel which is
connected to the ESP32 microcontroller on GPIO pin 5. The ESP32 webserver should provide a single, lighter themed, web page to control the NeoPixel. The web page should be as follows: Page title "NeoPixel Controller Page" It should have a header of the same title with the text centered. It should have a footer with the following centered text "Craig A. Lindley" Page content consists of three high level named groups labeled "Power", "Colors" and "Dynamics". The "Power" group consist of 8 named buttons which control the NeoPixel. The 1st button should be labeled "On" and when selected turns the NeoPixel on with the color specified in the "Colors" group. The 2nd button should be labeled "Off" and when selected turns the NeoPixel off. The remaining buttons in the "Power" group when selected cause the NeoPixel to come on with the selected color, stay on for the specified time and then go off for the specified time. This process then repeats until the NeoPixel is turned off. The 3rd button should be labeled "1 min" and have the specified time of 1 minute. The 4th button should be labeled "2 mins" and have the specified time of 2 minutes. The 5th button should be labeled "5 mins" and have the specified time of 5 minutes. The 6th button should be labeled "10 mins" and have the specified time of 10 minutes. The 7th button should be labeled "15 mins" and have the specified time of 15 minutes. The 8th button should be labeled "30 mins" and have the specified time of 30 minutes. The "Colors" group consist of 7 named buttons which control the colors of the NeoPixel. The buttons in this group when selected cause the NeoPixel to display the specified button's color. The 1st button should be labeled "Red". The 2nd button should be labeled "Green". The 3rd button should be labeled "Blue". The 4th button should be labeled "White". The 5th button should be labeled "Orange". The 6th button should be labeled "Gold". The 7th button should be labeled "Rainbow". The Rainbow button is unique in this group as it causes the NeoPixel to repeatedly cycle through the colors of the rainbow. The "Dynamics" group consists of 4 named buttons which control the speed at which the dynamics of the NeoPixel change. If "None" is selected only the Rainbow color selection has the dynamics mentioned above and is affected by the selected speed. If slow, medium or fast is selected all of the selected colors have dynamics. The 1st through 6th color buttons have the brightness of the selected color smoothly change from off to full on and then back to off. For the 7th button the speed is how fast the NeoPixel cycles through the colors of the rainbow. The 1st button should be labeled "None". The 2nd button should be labeled "Slow". The 3rd button should be labeled "Medium". The 4th button should be labeled "Fast". |
This is the text based prompt I gave Claude in an
attempt to vibe code this project into existence. I was
astounded with what Claude came up with. The code
basically worked the first time. I did do some time
constant changes and I added support for MDNS but
besides that the code I am running in my house today was
written entirely by Claude. |