LED Clock Page


Home                               Craigs Pages                               Heathers Pages


As hard as it might be to believe, I had never built an electronic clock of any kind. I've always thought electronic clocks were passe and not worth the time to design and build one. In addition, I thought that all interesting electronic clocks designs had already been built so why bother building an also ran. However as I was looking around for something to do with the 15' of RGB LED ribbon (LPD8806) I purchased from AdaFruit it occurred to me that I could use a short segment of the ribbon (14 LEDs worth) to build a unique electronic clock which used the RGB LEDs to display the time, date and a few animated patterns.  I already had a SparkFun Pro Micro Arduino compatible micro controller module handy so the only part I was lacking was a real time clock (RTC) module. I wanted to use a battery backed up RTC module to make the clock accurate, reliable and impervious to power failure. I chose the ChronoDot ultra precise RTC module from Adafruit speced at less than a minute of drift per year. Designing the LED clock circuitry was easy because of the small number of parts involved. See the schematic at the bottom of this page for the details. To simplify the design I decided to power the clock via USB so no power supply components were required. With all of the parts in hand I breadboarded the circuitry and wrote the software for the LED clock using the Arduino 1.0 IDE. The software for the LED clock is freely available here. If you use and/or modify the LED clock software and redistribute it, I would appreciate an attribution.

With the hardware and the software complete I turned my attention to packaging the clock. I wanted a modern looking clock that anyone could read. That meant the clock would have to resemble a normal clock with hands to some degree. My clock would not read out in hex or binary like many nerd clocks I've seen. After a lot of ideas and sketches I came upon the idea of building the clock out of clear Lexan and colored acrylic discs. This choice of materials resulted in a modern/contemporary look for the clock as can be seen in the images below.

One pleasant but unanticipated side effect of the clock's packaging geometry is that in the dark the clock projects a collage of colors on the wall behind it. The color and the shapes change with the time in very pleasing ways. Check out the clock in action in the YouTube video below:


Details, Details

Two momentary pushbutton switches mounted to the rear of the clock are used to set the time and date. The top pushbutton is the increment button and the bottom button is the decrement button. If both pushbuttons are pressed at the same time the value of the item being set is accepted and the clock proceeds to the next settable item. The order of settable items is: hours, minutes, month, date and  year. The seconds count is always reset to zero when the minutes are set.

Each settable item has a specific LED color associated with it. The colors are:
hours - red
minutes - green
month - yellow
date - magenta
year - cyan

Pressing both buttons at the same time puts the clock into the time and date setting mode. All 12 of the radial LEDs will first flash in the color of the item to be set. For example, the hour setting mode will sequentially flash the LEDs in red before the current hour value is displayed with a single red LED. Use the increment and decrement buttons to set the correct hour. AM is indicated if the middle left LED is lit. PM is indicated if the middle right LED is lit. When you have selected the correct hour again press the two buttons together which will save the new hours setting and transition the clock into the minutes setting mode. Use the same process for setting all other settable items. Note: if you want to retain the current value of a setting just press both buttons together to skip over the setting. After simultaneously pressing the two button while in the year setting mode, the clock will transition back into normal clock mode displaying the hours and minutes.

Setting of the minutes, day and year are different because they can have values greater than that which can be displayed directly on the clock. Minutes, for example, can have values of 0..59. Say we want to set a minutes value of 45. When you go into the minutes setting mode you will see the clock flash all of the LEDs in the minutes color some number of times. Each flash represents 12 minutes. A value of 45 would then be displayed with three flashes followed by the 9 o'clock LED being on because 3 * 12 + 9 = 45.  The year value is relative to the year 2000. So the year 2012 would be indicated by one flash of year color followed by the 12 o'clock LED being on.
Hopefully you get the picture. Setting the clock is easy once you understand the technique.

If the clock did nothing but display the time continuously it would get boring pretty quickly. To prevent boredom I have defined three events which fire periodically to liven things up. There is a 10 minute, 15 minute and 30 minute event. With each 10 minute event time display is suspended and a rotating color wheel effect is displayed. With each 15 minute event the full date is displayed. With each 30 minute event the clock goes dark and then brightens into full brilliance. You will have to see these events to appreciate them. In all cases as soon as the event is processed the clock returns to it normal display of time.


NOTE: the following pictures do not do the clock justice. It is much prettier than shown here.


Front View of LED Clock.

The clock is made from two 6"x 6" 1/2" clear Lexan squares separated by 1 1/2" threaded nylon spacers. The clock is held together by 6/32 hex head machine screws.

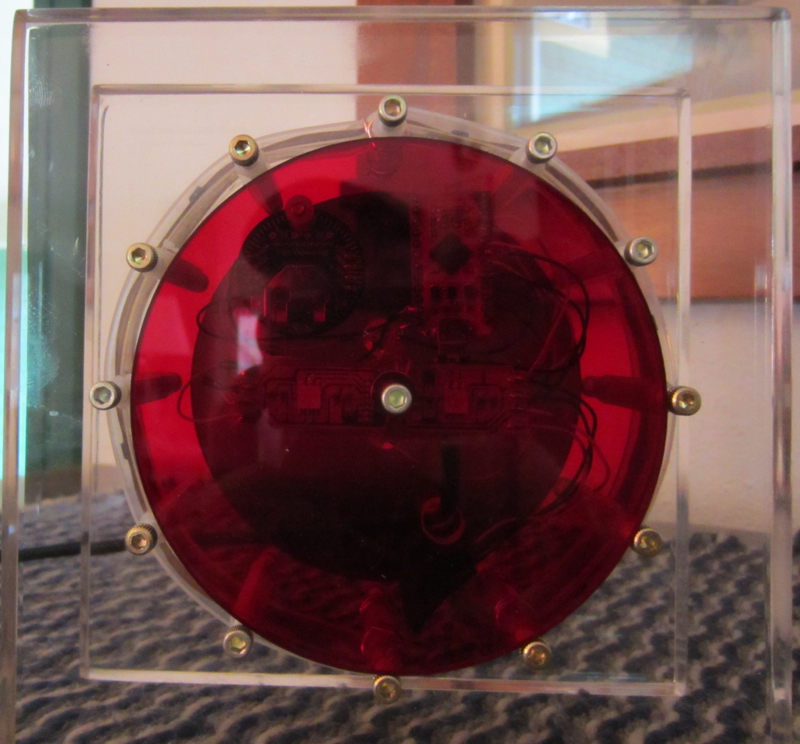
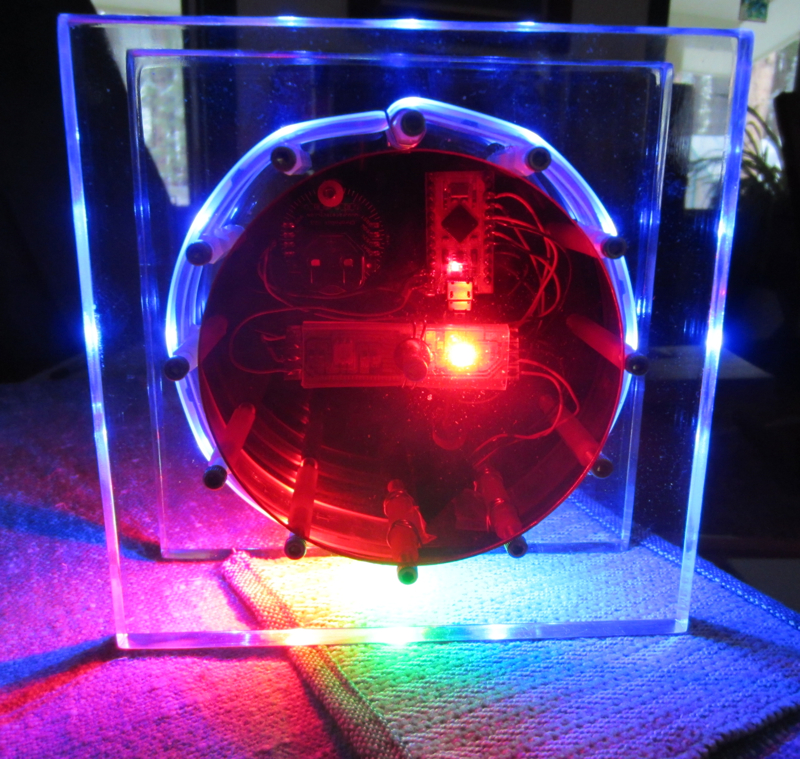
A translucent red acrylic disc is centered on the front of the clock which covers the clock circuity underneath.

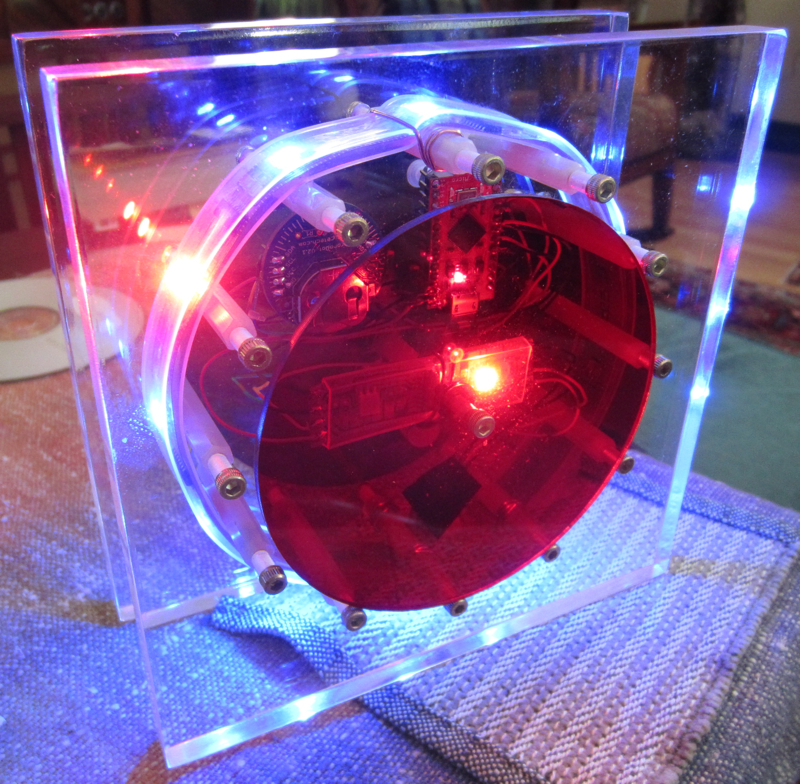
I used 12 screws in a circular pattern (one for each hour) as an aid to visualizing the time.

Angled View of LED Clock.

The red acrylic disc is held in place by a single hex head screw.

Side View of LED Clock.

Here you can see how the front and the back are held together with the screws and spacers.

The diameter of the circular pattern was chosen so that the 12 RGB LEDs on the ribbon would be positioned precisely on the spacers.

The Lexan was cut on my table saw and the edges were sanded with 220 then 320 then 600 grit sandpaper to get rid of the saw marks. Finally I heated the edges with a blow torch which melted the Lexan making it completely clear

Rear View of LED Clock.

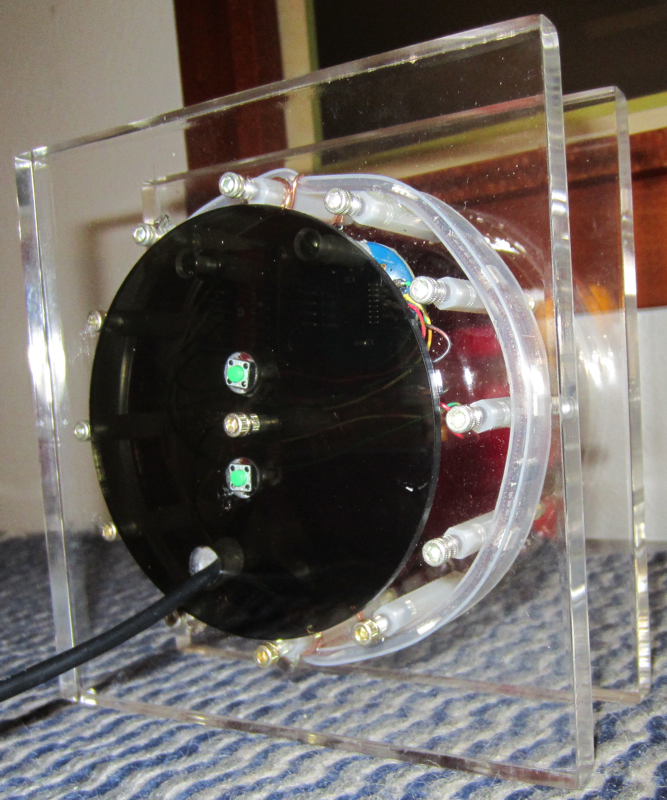
I used a smoky gray acrylic disc for the rear of the clock. It also is held on by a hex head screw. All of the electronics are mounted to the rear Lexan piece making it easy to remove the front for assembly and service.

Two pushbuttons are used to set the clock as described previously. The top button increments the current value. The bottom button decrements it. Pressing both buttons simultaneously advances the clock through it various settable items.

The USB cable coming out the back of the clock provides power.

LED Clock in operation.

My camera couldn't accurately capture the color/intensity of the LEDs. While it looks like the LEDs are just blobs of diffuse light they are actually very pure and beautiful.

There are two LEDs mounted behind the red disc which flash back and forth at a one second rate. Think tic, toc, tic, toc, etc.

In the dark the internal electronics are mostly hidden from view until the LEDs get real bright reveling them.

LED clock in operation.

Due to the geometry of the packaging the light from the LEDs is reflected off many of the internal surfaces.

You can see the rays of blue and red light being project from the clock in the lower left portion of the image.

In the dark the clock will illuminate the wall behind it in an ever changing collage of colors and shapes.

LED clock in operation.

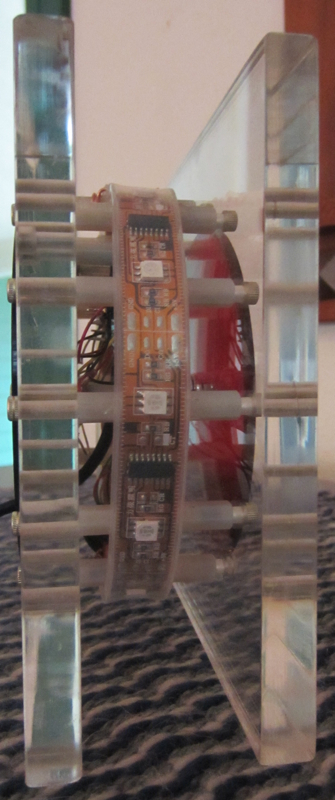
A view from the top.

LED clock in operation.

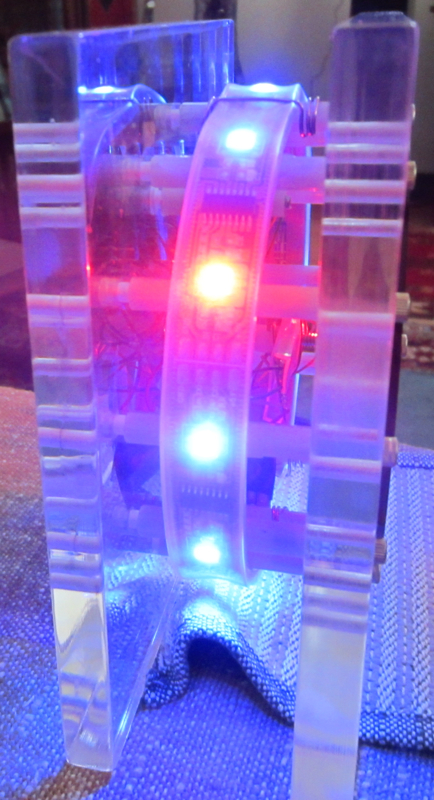
A view from the side.

If you look closely at the top you can see the wire used to hold the LED ribbon to the spacer. The LED ribbon is attached at the 12, 5 and 6 o'clock positions.


Schematic of the LED Clock


Home                               Craigs Pages                               Heathers Pages